Lieber Nutzer, die Forumssoftware wurde aktualisiert. Für die Erstanmeldung musst Du bitte dein Passwort zurücksetzen.
Dear user, the forum software has been updated. For the first login please reset your password.
Dear user, the forum software has been updated. For the first login please reset your password.
Benachrichtigungen
Alles löschen
Show us your Stepcraft Creations
6
Beiträge
3
Benutzer
0
Likes
5,335
Ansichten
Themenstarter
I made a work table for my machine that is high enough for performing all the operations while standing up straight. Some consideration was given to reduction of noise and vibration, therefore the offroad looking inflatable tires. 🙂
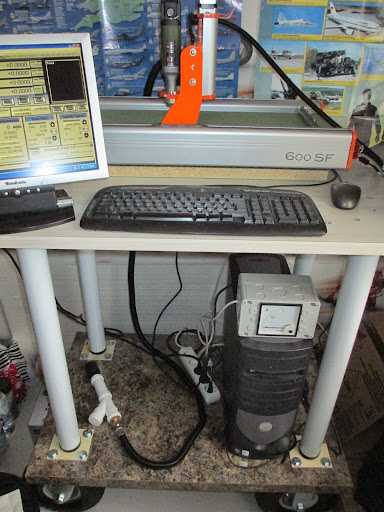
The contraption is pretty narrow so it doesn`t feel as stable as I would like, however, those fibreboard surfaces seem to give it sufficient rigidity. Two caster wheels make it possible to pull the table away from the wall for routine maintenance without having to lift the machine itself. Transparent enclosure is in future plans.
First small series detail that is also a part of the work table mentioned before.
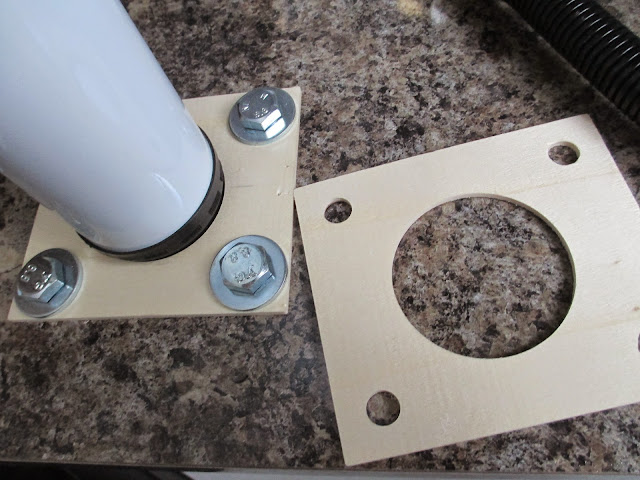
Battery box for an R/C model aircraft (not finished here).

My first milled assembly and experiment with a 1mm milling bit on plywood and balsa (so far 2mm bit has been used). The outer corners are sharp, but the minimum inner corner radius is 0,5mm. Those inner corners need to be filed sharp afterwards or edges stick out as seen in the photo.
Data (use at your own risk, no breakage so far):
Milling bit: Proxxon 1mm carbide 2 flute (catalogue no 28758)
Cutting depth for 3 layer birch plywood and balsa: 1mm
Feed for plywood: 300mm/min (the part was done before I had the guts to increase the feed)
Feed for balsa: 300mm/min at first, but was increased to 600mm/min.
Some more pictures can be found here:
https://picasaweb.google.com/104879839197278755668/Stepcraft600SF?noredirect=1
Stepcraft 600SF (version 1) parallel port
Proxxon IBS/E
Mach3
devCad Cam Pro; devWing Cam; devFus Cam; Profili Pro 2
Veröffentlicht : 08/02/2015 8:57 pm
Which CAD/CAM do you use to create these interleving walls?
Frank
Steppcraft 600/2 + HF500 + SwitchBox + Laser + Schleppmesser
Absaugung und Vakuumtisch
an Mach3 oder UCCNC mit Taster für Z-Null und Werkzeuglänge
Veröffentlicht : 08/02/2015 11:11 pm
Themenstarter
Which CAD/CAM do you use to create these interleving walls?
Actually I used a hand draft and a Notepad. Haven`t heard of a special feature like that. Wasn`t too difficult, but took a lot of time and patience. Dimensions were simple. It would be wise to make the gaps a tad wider and the tabs a bit shorter, but I didn`t. Balsa is soft so everything fits, or I just got lucky.
I am still looking for a CAD/CAM program, but I`m very picky. I had a chance to use the Keller SYMplus that has a CAD/CAM feature and I would like to get something as user friendly as that. Sadly the Keller CAD/CAM is too expensive for my hobby use. I am currently looking into devCad series that looks promising for my R/C model plans.
Stepcraft 600SF (version 1) parallel port
Proxxon IBS/E
Mach3
devCad Cam Pro; devWing Cam; devFus Cam; Profili Pro 2
Veröffentlicht : 09/02/2015 7:44 pm

There is a program for PC written by a member of a different forum. The forum is called cncecke and the program is called Kästlegenerator.
You give the dimensions number of separate sections ... and it generates a DXF for all the parts you need.
Due to copyright rules it is not allowed to distribute the software here, but if you send me your email-address via PM, i can send you the exe - which is allowed.
SC 420 mit DIY parallel + Proxxon mit Mod + HF500 + SprintLayout + LibreCAD/QCAD + FreeCAD +WinPC starter/USB->EstlCAM + EstlCAM LPTAdapter + EstlCAM Handrad + DIY Vakuumtisch
Gruß, Andreas
Veröffentlicht : 09/02/2015 8:53 pm
Themenstarter
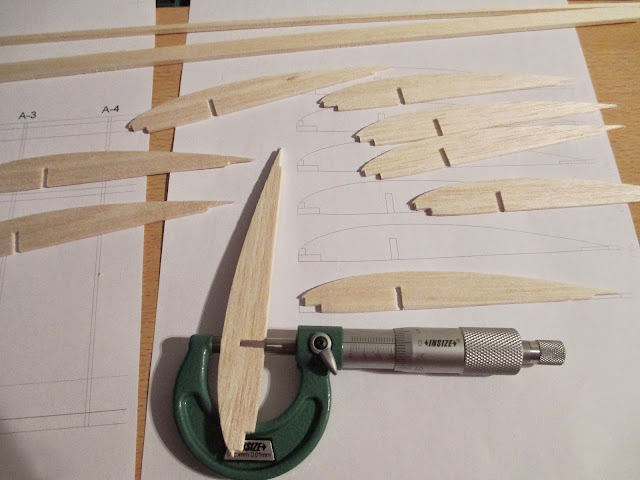
First experiments with devCad Cam Pro (spars) and devWing Cam (airfoils) programs:
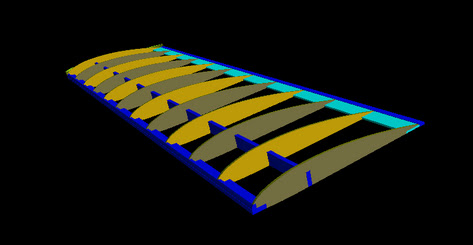
devWing Cam screenshot
Airfoils are cut out from 1,5mm and spars from 3mm balsa with a 0,8mm milling bit.
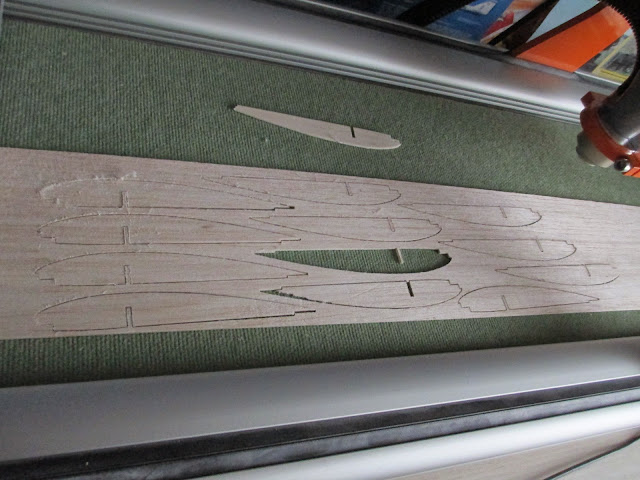
The balsa sheet was almost as long as the machine bed and it was attached from both ends. I recently changed couple of parts in my dust extraction system to increase vacuum and decrease noise. The nozzle created enough vacuum to pull the board and ready made parts away from the table. Forseeingly the hose connector had two input openings. Opened the second one and tried various couplers with different diameters to relieve some pressure. One of those couplers started to make a whistle that almost blew my ears off lol. With the problem somewhat rectified the cutting continued. Luckily only ruined two wing ribs. I have seen advice about using spray glue, double-sided tape or a vacuum table. I have seen vacuum tables in perfect size to fit some Stepcraft machines, but not the 600SF version.
3mm balsa is a bit stiffer, but the spars themselves are long and narrow, so these started to move as well. The result wasn`t exactly perfect. Both used programs have an automatic feature for adding support bridges that hold the parts steady. These have to be cut out later by hand similar to some lazer cut kits available in shops. Didn`t use them this time, because I wanted some straight line cutting speed.
According to calculations the max thickness of the airfoil should be 16,62mm. I measured some 16,5mm (soft balsa is tricky to measure that accurate). The edges were not as clean as in the case of laser cutting, so couple of passes with a sanding block were needed. The parts were cut with conventional milling, but the outer edges that were on the climb milling side didn`t look any better.
Cutting data:
Solid Carbide-End Mill Ø0,8mm, shank: 3,175mm (1/8")
Double-Flute
Fishtail Bottom
Upcut-spiral
Feed: 500-700mm/min for ribs, 700 up to 1000mm/min for spars.
Infeed: 120-240mm/min
Cutting depth: designed 1mm, but in the case of 1,5mm balsa it increased temporarily to 1,5mm when the material was pulled away from the table.
Stepcraft 600SF (version 1) parallel port
Proxxon IBS/E
Mach3
devCad Cam Pro; devWing Cam; devFus Cam; Profili Pro 2
Veröffentlicht : 07/03/2015 10:14 pm
Themenstarter
Examples of finished battery boxes in some of my models:


Mounted with superglue or with an aerosol construction foam.
Stepcraft 600SF (version 1) parallel port
Proxxon IBS/E
Mach3
devCad Cam Pro; devWing Cam; devFus Cam; Profili Pro 2
Veröffentlicht : 15/05/2015 8:15 pm
